 This step by step guide is to help achieve a velvet manicure. In a nutshell the nail is painted in the desired colour, then sprinkled with velvet fibres. What we particularly love is that it takes just £1 to get this look (again and again).
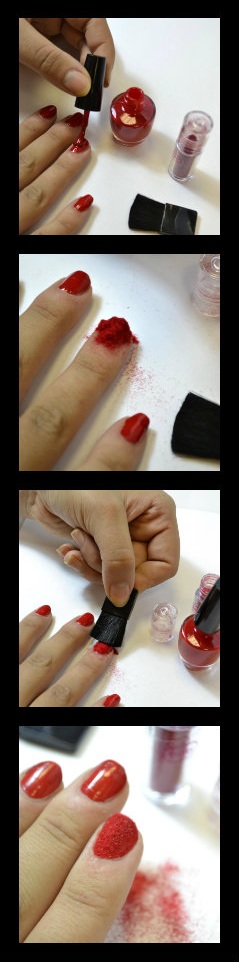
You will need Pretty Velvet Effect Nail Varnish available in Dealz. There are three colours to choose from; plum, red and cream. For this step by step we have used red. Ensure the nail and surrounding skin is completely dry and free from any oils or moisturisers before you begin.
- Apply provided nail varnish to clean dry nails.
- Wait until nail varnish is dry and apply a second coat.
- Whilst the Nail Varnish is slightly wet, sprinkle the velvet powder over the wet nail.
- Brush away any excess powder with brush.
- Neaten up the nails buy using the brush to dust away any loose velvet around the nails and fingers.
- Pour any excess velvet powder back into the tube.
- Your Velvet Nails are ready to go!!

*tip: apply the velvet fibres over a piece of a4 paper and you can pour the excess back into the bottle!